Delete Jobs Uploaded to PostalOne!
This technote covers two reasons why you may need to delete a job on PostalOne! and re-upload the job:
- You need to remove some containers from your presort
- You need to change the mailing date of your presort
The instructions in this technote will allow you to keep the intelligent mail barcode data that has been associated with the records of your original presort. This way, if you've already printed this mailing or you uploaded it to AccuTrace, the barcode data will remain the same if you have to presort again.
How to delete a job that has already been uploaded to PostalOne!
In AccuZIP6, pull down the File menu and choose Print Presort.
If your presort isn't already open, click on the Database pull down menu and select the database you presorted. This should open the correct presort. If it doesn't, then click on Close Presort, click Open Presort, then locate the correct presort folder and double click on the presort.rte.
With the correct presort open, click on the button with the red X, to the right of the Job ID box.

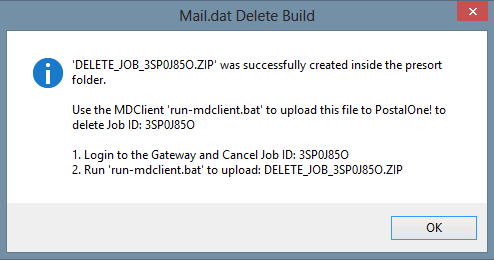
Clicking this button created a .zip file inside of your presort folder. The name of the .zip file begins with delete_job_followed by your presort Job ID. You'll upload this .zip file to PostalOne! in order to delete the job.
When the Mail.dat Delete Build window appears, follow the instructions on that screen to delete the job.

Once the job has deleted, you'll have the ability to make corrections to your presort and upload a new job.
How to change the mailing date of the job, then reupload it
In the Print Presort window, click on Print Reports.
Change the mailing date. Click Print. Click Continue to generate the reports, which will take you back to the Print Presort window.
Now you are ready to run the run-mdclient.bat file again and upload the job to PostalOne.

