From the Page Settings window, click the New button ![]() . The Label Layout Assistant appears, as shown below.
. The Label Layout Assistant appears, as shown below.
The AccuZIP6 5.0 Label Layout Assistant is an incredibly powerful feature packed into an easy-to-use interface. If you haven't familiarized yourself with the Label Layout Assistant at this time, review the information found in the Creating a New Label Template topic. This covers template creation and naming procedures, as well as basic address block creation. This topic is designed for users who wish to use the Label Layout Assistant to create custom content on their labels without entering the Label Designer itself.
Adding Fields through the Drag-and-Drop Interface
Adding fields and content through the Label Layout Assistant couldn't be easier! Follow the instructions below to begin creating custom content on your labels in AccuZIP6 5.0.
From the Page Settings window, click the New button ![]() . The Label Layout Assistant appears, as shown below.
. The Label Layout Assistant appears, as shown below.

Since you already know how to design a basic Avery 5161 label, we'll continue using the example found in Creating a New Label Template. However, instead of using the Default Address Blocks area as in the previous topic, we are going to create a custom address block that includes both text and variable fields, much like the information found in Adding and Combining Fields. If you've reviewed the information found within that topic, you'll realize just how simple and powerful the Label Layout Assistant is. The address block we're going to construct using the the Assistant will contain the following information:
Barcode
Tray Number, an asterisk, Bundle Number, and the Endorsement line
"Valued Customer" static text along with First and Last fields
"Or Current Resident" static text
Address field
City field, a static text comma, State field, and zip field
Whereas creating a template with all of that information could be a headache if writing it manually, the Label Layout Assistant makes it extremely simple! We'll start by focusing on the Field List and Mail Merge Fields areas.
Mail Merge Fields Area
The Mail Merge Fields area is where the body of your new label will be constructed. Very basic syntax will appear here as you drag and drop fields from the Field List on the right.
Field List Area
The Field List area contains all of the current database's fields, as well as all AccuZIP6 5.0 default presort field names. This allows you to create a template using not only your active file's fields, but also fields like "Endorse" and "Sequence" that wouldn't appear in your non-presorted database.
Creating the Address Block
The first thing we'll do at this point is construct the top line.
Since Barcode is the first desired line of our custom address block, we'll scroll through the Field List on the right until Barcode is showing.
Click on the <<Barcode>> field, and drag it from the Field List to the Mail Merge Fields area. Release the mouse button and <<Barcode>> appears in the Mail Merge Fields area, as shown:

That's all there is to it!
Since we've completed the process of creating the first line, we'll now press the enter key while the cursor is still positioned within the Mail Merge Fields area to create a new line.
The next line looks more complicated: tray number, an asterisk, bundle, and the endorsement information. Now is where you'll see how easy it is to use the Label Layout Assistant!
From the Field List, scroll down until you see the separator titled "--Presort Fields---------". The field we'll use is named "cont_id", found in the presort fields group. Click and drag cont_id from the Field List to the Mail Merge Fields as in the previous step.
You should now see a Mail Merge Fields area that resembles the following image:
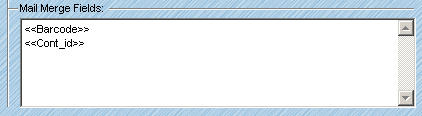
Next we'll add the static text asterisk after the <<Cont_id>> field.
Simply place your text cursor immediately after <<Cont_id>> and type an asterisk (*). That's all there is to it!
Too create the rest of the endorsement line, you'll then drag the field gpb_id from the Field List to the Mail Merge Fields as in the previous steps.
Lastly, drag the field named Endorse from the Field List to the Mail Merge Fields.
Congratulations! You just created your first label line that contains both static text (asterisks that print every piece) as well as variable fields (Cont_id, Gpb_id, and Endorse). Your Mail Merge Fields should now appear as shown. If it does, you're on pace to become a label creation wizard in no time!

Now you see how simple it is. Drag fields from the Field List to the Mail Merge Fields for variable data, and simply type the text that you want for static text. Press Enter for a new line and repeat until your label is finished!
Press Enter to create the third line.
Type Valued Customer (with a space after it, since you don't want "Valued Customer" positioned right next to a name without a space) in the Mail Merge Fields.
Drag the field First from the Field List to the Mail Merge Fields.
Type a space, and then drag the field Last to the Mail Merge Fields. You should see a space between the static text and your first field, as shown:

By now you've got the hang of it. We'll create the last lines quickly and easily, and then show the finished product before previewing the label.
Press Enter to create a new line.
Type Or Current Resident
Press Enter to create a new line.
Drag the Address field from the Field List to the Mail Merge Fields.
Press Enter to create a new line.
Drag the City field to the Mail Merge Fields.
Type a comma (,) and then a space.
Drag the St field to the Mail Merge Fields.
Type a space, and then drag the Zip field to the Mail Merge Fields area.
You're finished with the address block creation! Your Mail Merge Fields area should now resemble the following image:

The final step is to give the template a name using the Save Label Template As line. For the purposes of this tutorial, we'll call it "5161 Tutorial".
Type your desired label template name in the Save Label Template As line.
Click Preview.
That's all there is to it! Here is our completed template using the instructions found in this tutorial:

Close the Preview and click the Save button to return to the Print Settings window.
You'll see your newly created template in the Template pulldown.
You're ready to print, and congratulations on creating your first fully customized label template using AccuZIP6 5.0's powerful Label Layout Assistant!!