 Windows XP
 Windows XP
1. Use the supplied Rena driver.
2. Set the driver's paper size to 3 x 13.5 in the control panel.
3. Edit your chosen label template (generic.lbx is a good choice to start with).
4. From the File menu, select Page Setup.
5. Click on Print Setup.
6. Change the paper size to 3 x 13.5.
7. Click OK to close the Print Setup screen.
8. Click OK on Page Setup to return to the Label Designer.
9. Scroll down in the label designer and double click on the Detail bar.
10. A height window appears. Type 2.98 in the height box.
11. From the File Menu, choose Save As...
12. Give your new label a name and then close it.
13. Select your newly named template in the template pulldown on the Print Settings screen.
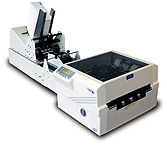
14. Choose Rena Envelope Imager III in the printer pulldown on the Print Settings screen.
15. Print!